Hobby Project to Production: Infrastructure Migration
These are my notes on setting up the infrastructure to transform FeedWise from a hobby project to a Production-ready application.
Context
Here's a bit of context on what I was trying to accomplish.
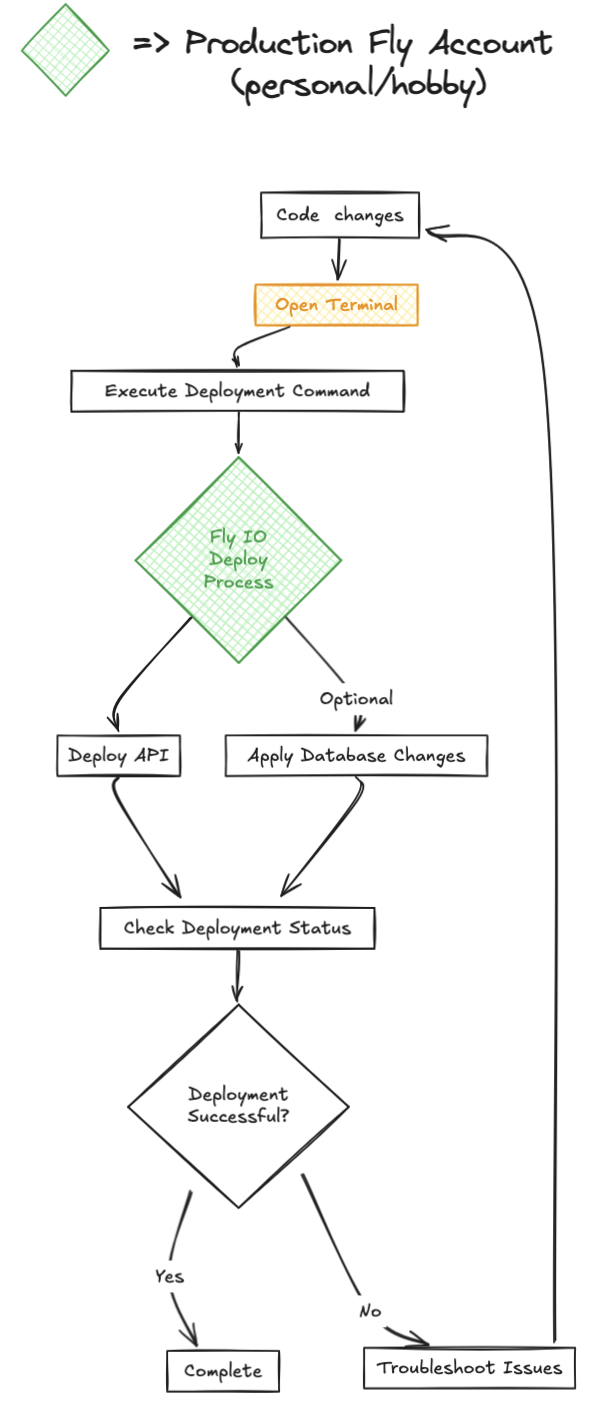
This is what my deployment process looked like at the start of this project:

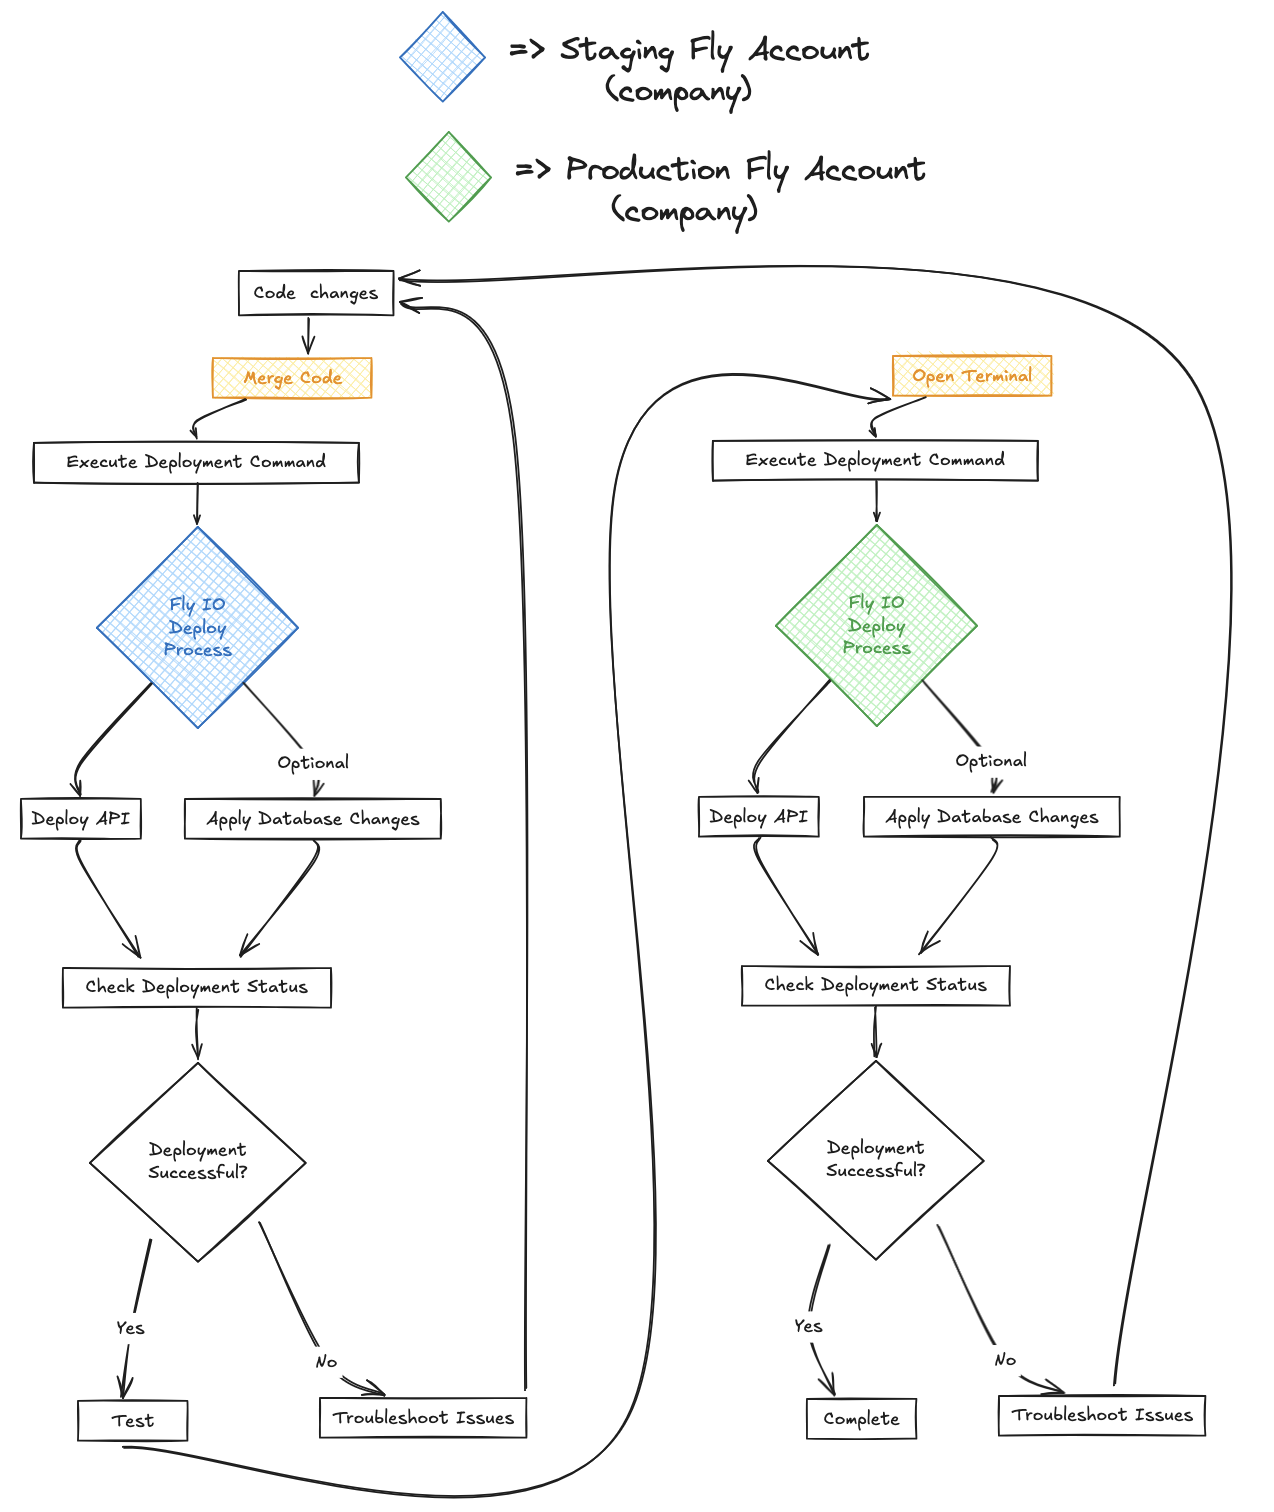
This is the desired process for after the project:

The goal was to move the existing infrastructure from my personal Fly account to the new company account and introduce a new Staging environment.
Setting up the Staging environment
There are some concepts that are not meant for this post. For example, I'm not going to explain why I think introducing a Staging environment is beneficial. And of course there is setup involved with creating a company Fly IO account, connecting a payment method, etc.
Setting up the Staging environment involved the following steps:
- Create the PostgreSQL DB in Fly
- Deploy the Staging version of the API
- Configure certs
- Deploy/configure the Staging version of the client
- Configure automatic deployments
- Ensure you can connect to the database (optional but recommended)
Create the PostgreSQL DB in Fly
Before I created the new DB I needed to find the existing image ref for the current Production DB. It needs to match since this environment should be as close to Production as possible.
To find this information:
# find the Production database NAMEfly postgres list# find the image informationfly image show -a stg-postgres-app-name
The values under the REPOSITORY and TAG columns reference the image to use. Legacy Postgres images use the flyio/postgres repository, while new Postgres Flex images use the flyio/postgres-flex repository.
For example, in my case REPOSITORY was flyio/postgres and the TAG was 14.6 so the image ref was flyio/postgres:14.6.
This is the command to create the new instance:
fly postgres create --image-ref flyio/postgres:14.6 -n stg-postgres-app-name -o acme-corp-llc
Follow the CLI prompts to configure according to your needs. Be sure to note the connection data that is output from this command. You can use it to connect to the DB in the relevant step below.
Ensure the DB is created and in a healthy state by checking your fly dashboard or by running:
fly status -a stg-postgres-app-name
Deploy the Staging version of the API
To do this I created a new fly-stg.toml file in my repository:
app = 'stg-api-app-name'primary_region = 'den'kill_signal = 'SIGTERM'[build]dockerfile = "Dockerfile.fly"[deploy]release_command = '/app/bin/migrate'[env]PHX_HOST = 'stg-api-app-name.fly.dev'PORT = '8080'[http_service]internal_port = 8080force_https = trueauto_stop_machines = 'stop'auto_start_machines = truemin_machines_running = 0processes = ['app'][http_service.concurrency]type = 'connections'hard_limit = 1000soft_limit = 1000[[vm]]memory = '1gb'cpu_kind = 'shared'cpus = 1
Then launch/deploy:
# launch API by follow promptsfly launch -c fly-stg.toml -o acme-corp-llcfly secrets set -a stg-api-app-name NAME=VALUE NAME=VALUE ...fly deploy -c fly-stg.toml -a stg-api-app-name# attach to the Staging DBfly postgres attach stg-postgres-app-name --app stg-api-app-name
Configure certs
I have a custom domain so the next step was to configure certs:
fly certs add api.staging.domain.io -a stg-api-app-name# check statusfly certs show api.staging.domain.io -a stg-api-app-name
Deploy/configure the Staging version of the client
I use Netlify to deploy the client build artifacts so this step basically involved:
- creating a new app
- pointing it at the GitHub repo so it deploys on merge to trunk
- adding environment config values
- deploying the app
Now it was time to test everything and make sure the app was functional when hitting the Staging URL.
Configure automatic deployments
For this I created a .github/workflows/fly-deploy.yml file:
# See https://fly.io/docs/app-guides/continuous-deployment-with-github-actions/name: Fly Deployon:push:branches:- trunkjobs:deploy:name: Deploy appruns-on: ubuntu-latestconcurrency: deploy-group # optional: ensure only one action runs at a timesteps:- uses: actions/checkout@v4- uses: superfly/flyctl-actions/setup-flyctl@master- run: flyctl deploy -c fly-stg.toml -a stg-api-app-nameenv:FLY_API_TOKEN: ${{ secrets.FLY_API_TOKEN }}
Then all I needed to do was add the FLY_API_TOKEN secret via the GitHub UI for my repo and merge this new file to trunk.
Ensure you can connect to the database
This step is optional but I would recommend it just to confirm that you're able to jack into the private network for the new organization.
To connect to a Fly DB you need to install/configure WireGuard.
Once that's all set use the connection string data noted in the step above to create the DB in order to test your connection. I use TablePlus as my DBMS so I confirmed that I could connect to the deployed DB and saved the connection configuration.
Setting up the Production environment
Now that the Staging environment was set up the next step was to get Production up and running.
Setting up the Production environment involved the following steps:
- Create the Production version of the API
- Create a new PostgreSQL DB in Fly
- Ensure you can connect to the database
- Copy the Production data into the new DB
- Attach the API to the new DB
- Configure certs
- Configure the Production version of the client
Create the Production version of the API
There is documentation for moving a Fly project but I ended up just deploying a new instance of the API instead. I went this route because you cannot use this command to move a Postgres DB and I wanted to test the new set up before cutting over.
From the documentation linked above:
Fly Postgres: You can’t use the
fly apps movecommand for Fly Postgres apps. To move a Postgres app to another organization, create a new Postgres app under the target organization, and then restore the data from your current Postgres app volume snapshot.
Create a new PostgreSQL DB in Fly
At first, I looked into creating a DB from an existing snapshot of the Production DB but Fly does not support restoring from a snapshot across organizations.
Given the snapshot provisioning wasn't going to work, I just created a new app for the DB in the new organization.
fly postgres create --image-ref flyio/postgres:14.6 -n prod-postgres-app-name -o acme-corp-llc
Ensure you can connect to the database
Using the same WireGuard tunnel set up in the above section for the Staging testing, I tested the connection to my new DB instance.
Copy the Production data into the new DB
Copying the Prodcution data with TablePlus was a 2-step process:
- backed up my live Production DB from my personal Fly account
- restored the new Production DB from the new Org using the
.dumpfile backed up from step 1
Attach the API to the new DB
By default, the secret value with the DB connection string is set when deploying the API for the first time. To attach the new Prod API to the new DB I needed to update that value and attach it.
fly secrets unset -a prod-api-app-name DATABASE_URLfly postgres attach prod-postgres-app-name --app prod-api-app-name --database-name <configured-db-name>
Configure certs
The next step was to set up my Production certs:
fly certs add api.domain.io -a prod-api-app-name# check statusfly certs show api.domain.io -a prod-api-app-name
Configure the Production version of the client
In this case, I was actually switching to a new domain. This worked out for me because I could stand up a new Production API without cutting over the old one in the process and risking downtime.
Configuring my Production client was as simple as updating the base API URL environment variable.
Update 3rd party dependencies
Because my API URL was updated, I also needed to update all 3rd party dependencies calling into my system. Things like OAuth flows and web hooks from services just needed to be configured to use the new Production domain.